Saturday, July 28, 2012

Nail Art with Rhinestones

Hi everyone! I'm back at uni now which means that I have less time to spend on the blog once again. But worry not as I have quite a few posts in mind for the upcoming weeks, thus I will be motivated to continue posting once a week. I'll admit that I felt like I was going to have a writer's block until I remembered the list of blog post ideas I brainstormed a couple of months ago. Luckily I had some photos taken way in advance (probably from last year!) that I can use for a post today. I've finally gotten around to posting about this...


You're probably sick of me saying this but I shall say it again anyway just as a reminder. Nail posts will be very limited on my blog because my workplace doesn't allow nail polish and for me it's a hassle applying and removing nail polish after only a few days of wear.


Here I will show you a NOTD that I prepared earlier:


 It is honestly not the prettiest thing - I was only playing around with patterns


Rhinestones for nails are typically stored in a rhinestone wheel (hint: I will be including one in my upcoming giveaway - stay tuned for that!) however those in the same wheel are all the same size. Rhinestones vary in width (1, 2, 3mm etc.) and thanks to the Viva La Nails Sample Pack #3 I got last year, I was able to try various rhinestone diameters.


The colours of the rainbow :)


To receive the Viva La Nails Sample Pack #3, all I needed to do was pay for shipping so technically these are 'free'. They are out of stock now but if you are a blogger/YouTuber, you could try requesting for their first sample pack of nail stickers which are available.


I think back when I did take these pictures, I had work commitments so what I did was use double-sided sticky nail adhesive for false nails to allow for quick and efficient removal.


French nail tips~ simple yet pretty in my opinion


On top I added two coats of Essie nail polish in the shade 'Van D'go' and chose the gold and silver rhinestones as I figured that they would complement the pink polish shade well.


Can you recognise what I used to place the rhinestones in? Hehe


I randomly grabbed the lid of one of my eyelash box sets to use as my little cardboard container for my rhinestones. It's a suitable size and the sides prevent the rhinestones from falling out. To pick up the rhinestones, a dotting pen is the common tool to use but since I don't have one, I used a pair of tweezers.


I used a combination of the rhinestone sizes on my nails. I'll describe the patterns:


Pinky finger: Princess Diana/Kate engagement ring (I'll explain soon)
Ring finger: Diagonal bottom half
Middle finger: Diagonal line
Index finger: Nail tip
Thumb: Bottom third of the nail


I know, my descriptions make very little sense but yeah... I don't know how to phrase them better :( I hope they are still understandable... at least vaguely.


About the one I did on my pinky finger, it was originally a pattern of a flower however I had a more detailed look at it and then I got reminded of the engagement ring worn by Princess Diana and Princess Kate.


Is it similar? Haha I should have used a dark blue rhinestone but oh well, too late now!!


Sadly I'm really not an arty/craft person hence my nail art never looks amazing and I rarely decorate my nails anyway, including the times where I am not restricted to do so (work-related). Usually it's just the one shade of nail polish on my nails with nothing else. I feel that the effort put into nail decorating goes to waste if it doesn't end up looking nice =[


If you're not (nail) artistic like me, then I guess you could find other uses for these rhinestones. They're definitely not limited to nail usage.... you can use them to bling up your stuff! Again that sort of requires a lot of time and patience. Don't worry though, I reckon that around 90% of blinged products end up looking pretty afterwards. I am always captivated by sparkliness *__*


Questjen of the week:


How would you use rhinestones to decorate your nails?


I quite like the pattern on my ring finger - good use of rhinestones and the nail polish colour can still be clearly seen :)


Jen xx

Friday, July 20, 2012

My Current Face & Body Cleansers featuring KUU Konjac Sponges

Hi all ^^ This post is going to be about the face and body cleansers which I currently use and are suitable for sensitive skin. My face nor my body (lol, fortunately) will be shown in this post and as an alternative I'll be showing you Hello Kitty's pretty face:


It's my new mirror which I purchased from Morning Glory for $5 when they were having their anniversary 50% off storewide sale. I've been looking for a mirror that stands up on its own and can swivel around - it's perfect for doing my skincare/makeup routine.


I know that people might be a bit 'ew' about Hello Kitty which is understandable because really, you'd either love her or hate her. Regardless of whether this was Hello Kitty or some other cute cartoon's face, I still would have gotten it. I'm not a big Hello Kitty fan and I don't mind her. I like the pink :)


Sensitive skin can be both high and low maintenance. Low because a good, suitable moisturising cream is usually all that's needed. High because this skin type is rather 'picky' - certain face products may cause an allergic reaction/rash/itchiness and therefore non-serious 'treatment' is required to reverse the effects. Sometimes I am better off using no face products.


However, along with sensitive skin I have dryness, redness, blackheads, whiteheads and the occasional pimple. I have to use skincare products to retain healthy skin but they must be ones that are gentle and recommended for sensitive skin:


Products suitable for sensitive skin (3 face, 1 body):

L-R: Dermalogica Daily Microexfoliant, Gaia Skincare Pink Grapefruit & Jasmine Foaming Cleanser, Avene Gentle Milk Cleanser and Health Basics Soap Free Milk & Honey Body Wash


As you might be able to tell, these are all small/sample-sized products. You might be thinking, 'why?' Here are my reasons:

1. I always like to 'try before I buy' however when that option is not available for skincare items, I actually do have to buy before I try.

2. When purchasing new skincare products, I would go for the smallest size. My 'picky' sensitive skin may absolutely detest a new skincare product that I try... and then I'd have to discontinue its use. It would be such a waste to chuck out a full-sized bottle.

3. I have found that sensitive skin care products tend to be a little pricier than items for normal or oily skin. Smaller bottle = cheaper.

4. Travel-friendly!


Dermalogica Daily Microexfoliant
This is recommended for all skin conditions. I got this from Liquid Hair when they were having a complementary Dermalogica skin bar facial. I seldom used exfoliators (I thought it was too harsh for my skin) until I attended the skin bar facial where the lady recommended that I used this one. It's not too harsh and it does a really good job at making my face silky-smooth afterwards!


Gaia Skincare Pink Grapefruit & Jasmine Foaming Cleanser
I found this to be gentle and despite it being for 'normal/combination skin', it also says 'sensitive skin formula', which sounds perfect for me. It has certified organic green tea and chamomile, known to have anti-inflammatory effects. I like the fruit and floral notes in the scent - my two favourite types of scents combined!


Avene Gentle Milk Cleanser
This was from the last Glossybox before it joined with Lust Have It. I was so happy when I saw this in my box because I had ALWAYS wanted to try Avene but wasn't particularly keen on spending $20+ for a product. I knew their products would be great... I just couldn't bring myself to do it. Thankfully I have now tried Avene and what can I say... I love this brand! For very dry and dry sensitive skin. Fragrance-free product.


Health Basics Soap Free Milk & Honey Body Wash
The skin on my body is not as sensitive as the skin on my face so I can make do with pretty much any body cleanser. I want to specifically mention this one because it's enriched with aloe vera to moisturise and soften skin. Aloe vera has soothing effects which works well with sensitive skin, dry skin and also sunburnt skin. I used this while I was in Sydney at the end of last year and I could tell that it definitely kept my skin soft and smooth despite being out in the sun a lot. The scent is absolutely beautiful - milk and honey ^^ This was given to me by the lovely Jen who is a blogger from New Zealand! This product was 'proudly made in NZ' by the way :)


I wish I could delve into Asian skincare products but I worry that they will be too harsh :/ Oh well... I shall continue using what I have since I haven't experienced any issues with them.


I'd like to introduce these face and body cleansing sponges that I started using about a month ago. I'll share how I found out about these and explain what they are. They're called KUU Konjac Sponges....


I was contacted by Nicola and Martin Richards who run a business in supplying cosmetics and makeup equipment at The Makeup Foundation. They are based in Brisbane, Australia and after attending a trade show, they discovered Konjac sponges and trialed them on their 18 month daughter who suffered from eczema. To their surprise, the sponge gradually helped to clear up the eczema and helped her to maintain cleared skin. They kindly offered two KUU Konjac Sponges to trial:


Red clay and pure sponge


 Booklet and information cards


What are KUU Konjac Sponges and their claims?
  • Konjac = traditional Japanese jelly-like health food made from a type of potato called 'Konnyaku potato'
  • Japanese people have used konjac for more than a century, as a beauty treatment for their delicate skin
  • Facial AND body cleansing sponge
  • 100% handmade
  • Highly oil and water absorbent for thorough cleansing of impurities
  • Alkaline pH sponge functions to break down dirt and neutralise acidic areas
  • Cleanses and soothes
  • Stimulates blood circulation
  • Encourages the growth of new skin cells

I was happy to be provided with a booklet to have more in-depth knowledge about these sponges. You can have a read of the ones that I found to be really interesting:


First I will review the sponge that is suitable for all skin types


KUU Konjac Pure Sponge
Ideal for the whole family
RRP: $8.00

 String for the sponge to be hung dry


When I first took this out of the packet, I was so surprised that the sponge was already moist! That is definite proof that these Konjac sponges can in fact retain water extremely well (even after manufacture). And because of this, the sponge can be used on its own without soap. If you choose to use it with soap, only a very small amount is required to create a 'lava' due to its size and water retention ability. This sponge which seems to be forever moist will not dry out your skin - in fact it will do the opposite by leaving your skin moist. Therefore it is perfect for people with dry skin!


The pictures may be a little misleading... I mean, I'm looking at them thinking that they look hard and dense but really they're not! To me they're soft, squishy and bouncy haha.


KUU Konjac with added French Red Clay
 Ideal for mature and/or dry skin that needs rejuvenating
RRP: $9.00

 Looks like a rock, doesn't it?!


This is the one most suited to my sensitive, dry skin. The texture and appearance is very similar to the 'original' KUU Konjac Pure sponge. These are the differences:

  • Loaded with Iron Oxide - non-toxic red mineral as the pigment
  • Deep cleanses and exfoliates skin from the layers of dead cells
  • Leaves a soothing effect on irritated, sunburnt or sensitive skin
  • Helps with rosacea condition
  • Reduces appearance of fine lines and broken capillaries

In case you're curious about the red clay sponge being loaded with Iron Oxide, this is what I discovered from some small research. Without being too scientific, Iron Oxide is an inorganic non-toxic makeup colouring ingredient. Mineral makeup contains Iron Oxide which gives mineral makeup the ability to achieve a flawless look and to significantly benefit the skin. Incredible, hey? Hence this is why mineral makeup is considered 'better' and 'safer' to use, and also the best option for sensitive skin.


I interchangeably used the white and red sponge so I couldn't see a distinct difference of effect between the two but knowing that the red one was for sensitive skin, I used it for my face more than the white one, but used the white one more for my body.


I highly recommend this one for sensitive skin


If I suffered from rosacea, it would have been good to test this sponge on my skin to see if it does what it claims. Dryness will always be something that I'll suffer from so I'll be using the sponge to keep my skin hydrated as possible! The next time my skin suffers badly like allergy/rashes, I will use the red Konjac sponge.


Pros (+) and Cons (-) for both sponges:
+ Cleanses both the face and body
+ Does what they generally claim to do
+ No preservatives
+ No chemicals
+ 100% natural
+ No colours or additives
+ Sustainable and biodegradable (add to compost)
+ Suitable for all skin types
+ Perfect for infants
+ Cleanser or soap not necessary, can just add water
+ Good size, lightweight
+ Decent price
+ String for hanging
- Effects are not seen straight away - requires continued use
- Currently not readily available in Australia


Hmm.. there are really not many cons I could point out about these sponges. And even if there were, these only have a 2-3 month life span which means that I could chuck them out without hesitation. Luckily they're a keeper and I will continue to use them until they wear out! They have been a great addition to my cleansing routine.


There are two other sponges in the range - KUU Konjac with added French Green Clay (oily skin) and one for Babies:


If you would like more information about these sponges, there is a website that you can check out. And while you're there, you can also purchase them online!


A rather lengthy post as usual and I'm going to wrap it up with a questjen of the week:


Do skincare products' packaging matter to you?
As in like, the bottle... do you mind if it's plain/has little colour?

My answer: Not really...

Well yeah, I am a sucker for cute/pretty packaging for everything and anything but what's more important is what's inside (applies to people too) and as long as the skincare product does what it's supposed to do and it works for me then why would it matter how it looks like on the outside? I have noticed that the majority of sensitive skin products have plain, white packaging which is not the most appealing but I can put up with it. Take Avene's packaging as an example and also the image of my cleansers!

Jen xx 

Monday, July 16, 2012

New Hair! Courtesy of Groupon

Hi everyone! A couple of months ago I was contacted by Joanna who works with the Research Team at Groupon and she has asked me to review one of their latest deals. I felt privileged to be given this opportunity and was really excited to pick a coupon to review!


A voucher of $20AUD was offered for my use and I chose to get my hair professionally dyed, cut and blow-dried. For many reasons:


1. I never had my hair dyed by a professional before, so this was going to be a first!
2. Regrowth from my previous brown dye
3. Uneven hair colouring from previous home dye
4. I wanted a change! Something darker for winter
5. Still on the hunt for the best hairdresser for me (quality and quantity wise)
6. A Groupon review that would interest my readers (yes, I thought about you guys too )


Since this was going to be my first time dyeing my hair professionally, I was really looking forward to my hair appointment that I even mentioned it in a few posts back and often tweeted about it! And on the day of the process I had some live tweets going on :)


I claimed the deal that Nadia's Hair Professionals had for Half Head of Foils or Full Head of Colour, Moroccan Oil Treatment, Style Cut, Blow-dry and more - $49 for one visit.


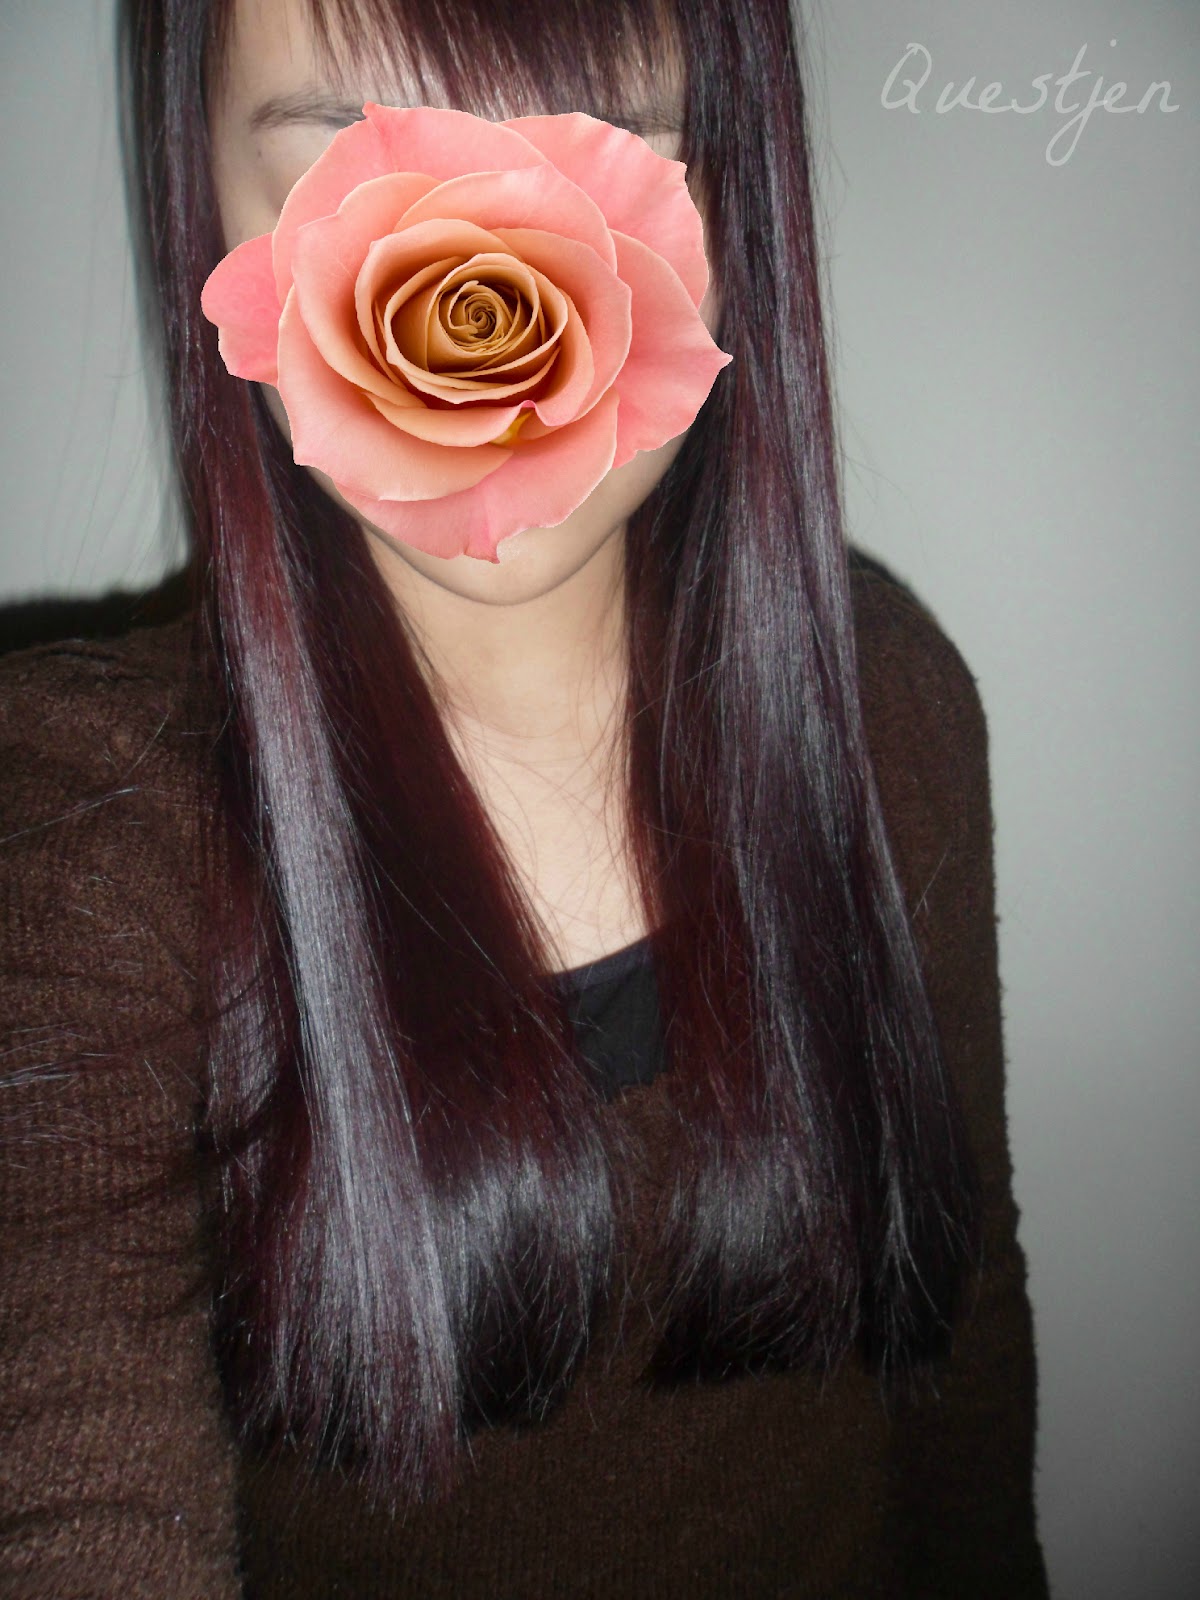
My appointment was at 10 am and it took me roughly 20-30 minutes to be driven there. I wasn't exactly looking my best (not really a morning person), therefore I have used random shapes to cover my face in some of my pictures.

My hair before my appointment


Was I happy with my previous hair? Well... it was okay. I was in definite need of a dye job, I had frizz/static hair yet I liked the length. Free of split ends but had knots. With this appointment, I was only really aiming for it to be coloured, trimmed (a chop was a big no-no! I value my long hair too much), frizz-free if possible and have my shorter side bangs back. I actually got used to having a longer side fringe but then I remembered how a shorter one suited me more and made me look younger, hehe.


I'll take you through my experience at Nadia's Hair Professionals...


I arrived about 5 minutes early and was warmly welcomed by a hairdresser who was working on a customer at the time. I was told to take a seat and I did so for about 5 minutes. Here I am waiting, with a large mirror beside me:


Bad angle, oh well. I will miss the way my hair looked golden brown when the sun shone onto it...


The seat at the window is where I sat and waited


The hairdresser introduced herself to me as Ashlee and she asked me what colour I was after while showing me a thick book of colour charts. I sort of knew what I wanted but seeing all of these different shades in front of me, it took me a while to decide! Before coming in, I had my mind set on a purple-brown with red/dark pink undertones. There are actually so many variations of shades under that description... I sat there looking for a few minutes trying to decide on what I wanted. What really helped me to narrow down the options was when Ashlee told me that the purple shades were really fashionable and that they're a popular choice this year. So right then and there I went for the purple with a hint of pink. I can't recall of the shade's name but it was something like cabaret? Red cabaret maybe? I'm not too sure, sorry!


Here is where Ashlee parted my hair in the middle and brushed the dye onto my roots. If you don't have bad regrowth like me (whole hair one colour), then this process would probably be skipped. I was a bit concerned about my hairline having dye on it... with home dyeing, I usually put vaseline on my hairline to prevent staining... hm. Well luckily my hairline didn't get stained *phew*


Dye on roots timed for 10 minutes before applying colour to strands
Coffee was offered but I went with water


All of the dye in, hair clipped up to a bun and waiting for the dye to settle


At this point the actual dyeing process was done! Did some more waiting and while this was happening, Ashlee had to work on another client. I didn't mind this as Ashlee had told me that the salon was short of staff and was the only one working that day.


When the time was up, I had my dye rinsed out, hair shampooed and had the Moroccan Oil Treatment put into my hair. I had only heard of this treatment; I did not know anything about how good it was etc. I had no real expectations of what this treatment could do to my hair - just the desire for my hair to be amazing ;D


After the wash a plastic bag was placed over my hair and I sat under this dryer/heater for roughly 10 minutes


I've never used one of these heating things before... what's the name of it?


This followed by a blow-dry which got interrupted 3 times by people wanting to make their appointments. They've been busy since having the Groupon deal and having one person working and picking up the phone isn't great.


Blow-dried hair!
Oh and Woman's Day magazine...


While Ashlee was blow-drying my hair, she said,
"I want your hair!"

I didn't know what to say after that so all I did was smile x)
No hairdresser has ever said that to me before... I feel very very flattered haha


I won't cover my face for the next picture but are you ready to see my new hair colour? Smiling lol...


Ta-da! Purple/pink/red/brown/black I don't even know what to call this exactly xD


I asked for a trim of about 3 cm and had my fringe cut and thinned-out. I didn't take anymore pictures while I was at the salon so the recount of my experience there is over now! 


Overall I spent about 3 hours there - the longest I had ever spent at a salon to do my hair. That's like doing one exam. I was very hungry! Anyway, I'm so glad Ashlee apologised for the time taken, which showed that she cared! I forgot to mention earlier that she was extremely friendly and made sure that I was content as she asked whether I was comfortable and satisfied with how she was cutting my hair. The service was wonderful :)


Now to see the finishing 'product':


I used flash so that the colour could show up better
And that rose is way prettier than my face :3


My fringe will look better once it grows a bit but I must say that I'm not overly happy with my ends being so straight :/ She used 'blunt scissors' to cut my ends however it looks as though she cut them straight across. The good thing is that she spent a decent amount of time cutting my ends and also made me stand up so that she could see whether it was even. This makes me miss my previous hairstyle's ends where they were cut using a razor to give a more feathered look :( I wanted to tell Ashlee this but the next client was in and I could tell that she was probably needing to speed up a bit for the next appointment.


Under lamp lighting, hair has a more red undertone


Good lighting gives it this colour - burgundy?


Bathroom lighting - pink/crimson undertone!


It looks like my hair can be seen as many different colours under different types of lighting but if anyone asks, I say that my hair is purple :)


Unfortunately the colouring is not as even as I had hoped because of my previous uneven colouring T__T It's okay... the black sort of blends in with the purple.


 I've found a way to make my ends look less straight...... curl them!


Side-by-side comparison! Which colour do you prefer???


Thank you so much Groupon for collaborating with me and for the awesome opportunity! A big part of my life has changed :) And also thank you Ashlee from Nadia's Hair Professionals for doing such a lovely job. Years ago I would not have dared to dye my hair an unnatural colour like purple but I am so glad I did now because I'm really happy with it!


My thoughts on Groupon:
It's a breeze to use! Go to Groupon.com.au > Choose your city > Browse the deals > Click 'Buy Now!' > Login or register > Select payment method and you're done. You pay for the coupon in advance and there is a set period of time of when it's valid. Unfortunately it will go to waste if you forget about it or don't make a booking. The voucher is then sent to your email after the deal promotion ends and all you do is print it out and take it with you to redeem :) I like how all of the deals that have been purchased are all one place so you can always check them if you need to:

(White space = other Groupon deal purchased omitted from picture)
Clean interface, simple to navigate and everything is clear!


Would I recommend Groupon?
I definitely would! I've used it 3 times and I have not had any issues whatsoever. Some of the deals are really fantastic as they can save you so much. I know it might seem a little concerning how you have to prepay but that is the policy and it's always best to read the terms and conditions before doing so for a deal. Like with the hair salon, I had no idea that the place even existed until I saw it on Groupon and I didn't know what to expect so before purchasing, I actually did a little bit of research. They don't have their own website but Google-searching the place helped and also using Google maps to find the exact location (because it's always best to be safe than sorry...). The amount of people buying a deal can be seen so you know how popular a deal is and I think it's good knowing that there are hundreds of Groupon users out there.


This post is getting way too long now.... I'll end it here! Thank you so much for reading ^_^


Questjen of the week:

Do you dye your hair to suit the season?
Darker for winter, lighter for summer? One colour all year round?

My answer: I do now

I used to want to dye it whatever colour I felt like but then I decided to go according to seasons to... I guess, match my outfits and the weather? Going darker for winter just seemed normal to me and since I previous had brown hair, I went for purple. I know that in summer I will definitely go lighter - light brown most likely, maybe not blonde!


Jen xx

Friday, July 13, 2012

GEO Lotus Violet Lenses

Hi all, I have a review of the Geo Lotus Violet circle lenses provided by MukuCHU. Just so you know, this is going to be a short and snappy one :)


POWER/PRESCRIPTION: 0.00 (Plano) only

LENS USAGE: UP TO 1 YEAR
SHELF LIFE: 3 YEARS
MANUFACTURER / ORIGIN: SOUTH KOREA
B.C.: 8.6mm
DIAMETER: 15.00mm
WATER CONTENT: 38%


MukuCHU sent me a pair of lenses by random to prevent biased views (and I personally think that it's better that way!) Anyway about these lenses.... they're from the Geo Xtra Flower series, there are 5 colours and they are 15.0mm in diameter. It's funny thinking back to when I first started wearing lenses and how I would be so concerned about the diameter, assuming that size plays a huge part in comfort. To me, all of the sizes from 14mm to 16mm feel the same on my eyes *shrugs* It's true that less oxygen can reach the eye when the diameter is larger however the best way to decrease the risk of potential damage is to wear larger diameter lenses for less periods of time i.e. maximum of a few hours in a day.


15mm lenses and larger are best worn with makeup because without it, it honestly looks creepy (well I reckon it makes me look possessed, especially darker lenses). So that was why I used top and bottom fake lashes to draw some of the attention away from my irises.


With flash


The lens design and colour show up much better under flash lighting. They're definitely not lenses to be worn if a natural look is desired! I find the pattern to be quite pretty - I wish my eyes had a crystal/sparkly effect *__* My natural eye colour is a really dark brown and so the only 'effect' that my eyes can have is... watery eyes haha. Oh and I should mention that having dark eyes make these lenses look less like stickers as they sort of blend in... especially under natural lighting.


Despite violet being an unnatural eye colour, I love this colour for lenses!


So, lenses from the GEO Lotus series are a great choice if you're looking for:

+ Enlargement with a considerably subtle black limbal ring
+ Sparkly/crystal effect
+ Colour change
+Comfort!

Yes, I found these lenses to be very comfortable to wear :) I had no issues whatsoever!


Thanks MukuCHU! If you're interested in purchasing a pair of these lenses, here is the direct link: http://www.mukuchu.com/2011/04/lotus-series.html


Last photo with this hair~~


Oh yus! In case you missed my previous post, I mentioned that I was going to get my hair dyed and trimmed! I got that done today and posted live updates on my Twitter (the pros of using Twitter and following me :P) so if you're curious to find out how my hair currently looks like, you can check out my pictures on Twitter ^^ Or you can wait until I make a post about it in a few days.


I hope you've all been well and taking good care of yourselves. You'll hear from me again very soon, I promise.


I can't think of a questjen of the week for this post, therefore I'll have one in the next!


Jen xx

Thursday, July 5, 2012

Instant Rapunzel Hair - Ponytail Extension

Hello all! This is my first post for July and my first post after my month-long hiatus. It's great to be back but unfortunately something bad happened to me... well first I'll start off with the good news.


I've finally bought a new phone - Samsung Galaxy S2! Actually, I started a plan two weeks ago and have no paid a single cent yet (still got a while until the bill arrives).  I contemplated getting the Samsung Galaxy S3 since it only just came out however I wasn't too happy with the design and appearance (for some reason it looked cooler online lol) so I settled for the previous model which I am really happy with thus far.


Here comes the bad news... from being quite a noob with my new phone, I accidentally ticked the 'select all' box and deleted all of my photos on my phone (including the ones on my SD card) and wait for it... I stupidly had Google Picasa images automatically synced onto my phone. If you're using Blogspot then you know exactly what that means.... yes, I deleted ALL of my blog's pictures. In total I deleted 2000+ pictures in a matter of seconds... AND THERE'S NO WAY I CAN GET THEM ALL BACK! Far out, I was extremely frustrated and I wish there was an undo button or a recycle bin on the Android operating system. How could I be so stupid T__T I only wanted to delete one photo. I panicked like mad and seeing my blog after all the pictures were removed was devastating. It broke my heart. I've been blogging for over 2 years and the hard work of taking photos, editing them with watermarks and uploading them felt like it has gone to waste. I am such an idiot. Right then and there I felt like totally giving up on blogging.


And what do you know, I'm still here.


Luckily I still have 98% of those deleted photos on my laptop and external hard drive so they aren't exactly deleted forever but they're just not on my blog anymore. I couldn't be bothered re-uploading all of the pictures of past posts so I just did a few.


I definitely learnt the hard way and I have now disabled the syncing. I don't mind re-uploading past pictures from my old blog posts - feel free to make a request!


So now to what I really wanted to blog about!


This will be a hair post using a ponytail extension hair piece from KKCenterHK :) Since I already have long hair, I went for the longest hair piece available on the website:


$14.01 USD

Here I am modelling the hair piece


To the people in the Northern Hemisphere who are experiencing warm/hot weather right now, sorry if the sight of a jumper is making you cringe - it's freezing in Australia right now! I was still cold wearing the jumper :P


This is what it looks like and it is in the shade #2T30 (lighter than this picture)


Instructions on how to wear the hair piece (clip and tie)


The length of my hair from my scalp to my ends is approximately the same length as this hair piece. When I wear the hair piece with a high or low ponytail, there is definite length added and so I am glad that I chose this length over the shorter ones which probably wouldn't have made much difference.


Correction, my hair's length not tied up!


The extensions' synthetic hair is so...much...more...silkier than my hair!


It was difficult to pick out the exact colour to match my dyed brown hair. I did my best~

I like how there's a ribbon to tie the hair extension on which also makes a nice hair accessory


 It goes past my hips

(Irrelevant but the word 'hips' just made me think of the word 'hipster'... how did that come about?)


Pros (+) and cons (-):

+ Simple to apply and remove
+ Synthetic hair is silky and smooth, easy to brush through
+ Wide range of shades to choose from
+ Adds plenty of length
+ Not too difficult to maintain
+ Tie-on ribbon doubles as an accessory
+ Comes with washing instructions
- May be a little costly for some ($14USD)
- Strands fall out while being brushed
- Does not look very 'natural' due to the shine
- Prone to static-ness, tangles, frizz
- Would not be as long-lasting as human hair extension pieces


So to sum it up, I reckon that this hair piece would be most suitable for a dress-up/cosplay thing rather than for daily use, but of course it is completely up to the person wearing it. 


If you're interesting in purchasing your own, here is the direct link

For any of your purchases from KKCenterHK, you can have 10% off using my code which does not expire until next year: BLGB345JL10

~~~~

The other reason why I decided to do a hair post today was because I'm getting my hair cut and dyed next Thursday! I'm really excited because this will be my first time getting my hair dyed by a professional and it'll be my first time attending this hair salon. I got this from a Groupon deal which I will blog about next week.


And it was appropriate for me to review this hair extension piece before cutting and dying my hair a different shade.


I would like to only trim my hair though I wouldn't mind if the hairdresser snips off no more than 10cm. But I don't know about the style.... layers? Thinner hair?


So I'd really love some help from you guys before I go to the hair salon :D My questjens of the week are back hehehe:


1. What colour do you think I should dye my hair? Something suitable for Winter perhaps?

What I have on my mind right now are various shades of dark brown, reddish brown and dark purple if that's possible. Ahaha, they just remind me of winter colours. It would be awesome to go lighter though... but then the regrowth :(

2. Should I have a short side fringe or grow out my bangs?

In most of my pictures I have short side bangs but they've grown out and now they look like this:


I look more mature like this! But does it suit me...?


HELP ME PLEASE! I'M VERY INDECISIVE


Thanks for reading this post guys! I'd really appreciate the feedback


always, Jen
Related Posts Plugin for WordPress, Blogger...